
Adobe Creative Cloud (CC) makes its software available as a monthly subscription service (instead of paying for this software all at once). The fee will depend on the number of apps you get. It also includes added services such as cloud storage, font library, and a modifiable portfolio website.
However, the apps in CC take up a lot of space. Or, you may not use it anymore. That’s why you need to know how to uninstall Adobe Creative Cloud on Mac completely and easily. This will free up boatloads of storage space on your hard drive or solid-state drive. Cleaning up the application cache and other caches on Mac can also free up a lot of storage space. You can refer to the links given.
Fortunately, you’re in the right place. This is a guide that will focus on how to uninstall Adobe Creative Cloud. We will teach you both manual and automatic methods to give you a lot of options. Let’s get started with some of the reasons why you can’t implement how to uninstall Adobe Creative Cloud on Mac.
Part 1. Couldn’t Uninstall Creative Cloud for Desktop on Mac?
Before we implement how to uninstall Adobe Creative Cloud on Mac, let’s find out the reasons why our attempt will be unsuccessful. In this way, you’ll know what to do about it when you encounter it.
One thing that will hinder you from uninstalling Creative Cloud is the fact that it’s still open within your system. In addition, some of the processes that work with CC are still open. That’s why you have to quit this first.
Quitting it can be done in two ways. The first method of quitting is through the standard process. You simply close Adobe Creative Cloud by quitting it in the normal way. However, sometimes, this doesn’t work if you want to implement how to uninstall Adobe Creative Cloud on Mac.
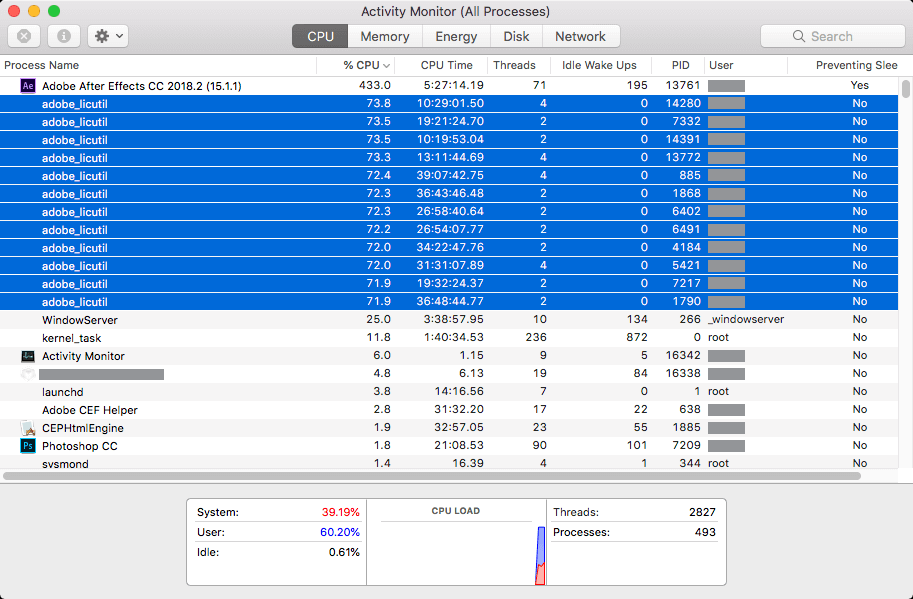
Another way to quit CC is to force quit it through the Activity Monitor. Here are the steps on how to do it:
- Go To Launchpad. The first thing you should do is to go to Launchpad on your Mac. Then, launch the Activity Monitor on it.
- Visit CPU Tab. Next, visit the tab called CPU. This is usually the first tab out of all the tabs you can see in the Activity Monitor.
- Select The Process Or App. Select the processor app from the list. In this case, we will be selecting Adobe Creative Cloud and other apps associated with it.
- Force Quit The App Or Process. Now, click the option to Force A Process To Quit (X). This is located in the upper left corner.
- Confirm that you actually want to quit the process or app. To do this, click Force Quit in the window that will appear.
Now, once you have forced quit the apps and process, you can proceed to implement how to uninstall Adobe Creative Cloud on Mac. However, there’s another problem why you can’t uninstall your CC on the Mac computer.
This problem pertains to the design of the Adobe CC app. For instance, every time you try to remove Adobe CC, you are informed that you should log into it properly. Or, it will ask you to put in your email address.
So, in order to start to implement how to uninstall Adobe Creative Cloud on Mac, you should place your credentials first. After that, the uninstallation process will start.
The engineers at Adobe may have designed the CC app in a way that it is necessary to be connected to the Internet. Or, it may be designed in such a way that you have to be signed in to your account. This can be very frustrating, especially if you don’t have both of the two prerequisites. However, there are still ways you can follow in order to uninstall CC on Mac.
Part 2. How to Remove Adobe Creative Cloud from Mac?
So, now we’ll teach you how to uninstall Adobe Creative Cloud on Mac manually. The easy process will be discussed later. We’re warning you that this is a very cumbersome process. On the flip side, it does work.
So, the first thing you need to do on how to uninstall Adobe Creative Cloud on Mac is to quit the Adobe CC app and its associated processes. Here are the steps you should follow in order to implement this exit process:
- Visit Activity Monitor. The first thing you have to do is to visit the Applications folder on your computer. Then, go to Utilities. After that, you can simply launch Activity Monitor within the list of utilities that will show up. You can also open Activity Monitor through the use of Spotlight.
- Look For Adobe CC Processes. Now, look for Adobe Creative Cloud and its related apps (and processes). Some of these may be Adobe Lightroom, Photoshop, etc.
- Select And Force Quit. The next step would be to select a process and then click the button for Force Quit.
- You can make sure you want to implement the Force Quit by confirming the action.
The next thing you should do is delete all the related apps of Adobe Creative Cloud. This is necessary in order to execute how to uninstall Adobe Creative Cloud on Mac. These related applications include Lightroom, InDesign, Photoshop, Illustrator, and more.
This will help you bypass the warning that says you can’t remove Adobe Creative Cloud because there are applications installed in your computer that need it. So, here are the steps you should follow in order to do this:
- Open Adobe CC. The first thing you should do is to open your Adobe Creative Cloud application.
- Visit App. The next step would be to visit the tab labeled App. Now, locate the Adobe CC-related apps that are installed within your Mac computer.
- Press More. Press the icon known as “More” for each app you wish to remove. This looks like three horizontal lines aligned side by side.
- Now, press Uninstall to start to remove it.
- Follow Instructions. Follow the instructions on the screen to remove the app.
- Repeat the steps for all the apps in Adobe CC.
Now, you’re actually ready to implement how to uninstall Adobe Creative Cloud. To actually properly execute how to uninstall Adobe Creative Cloud on Mac, it is recommended that you use the special uninstaller by Adobe. Here are the steps in order to utilize this uninstaller:
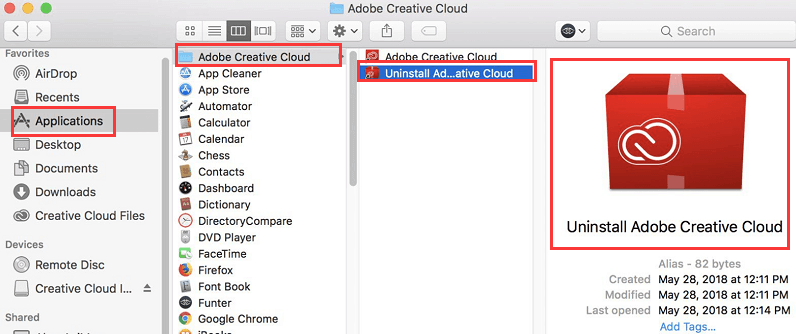
- Visit Applications. The first thing you have to do is to visit Applications. After that, go to the Adobe Creative Cloud folder.
- Open The Uninstaller. The next step would be to open the Uninstaller. This is named as Creative Cloud Uninstaller.
- Input Your Password. Then, a window will pop up. You have to input your username and corresponding administrator password that’s required. After that, press the OK button.
- Press Uninstall. In order to start the process on how to uninstall Adobe Creative Cloud, you must click Uninstall.
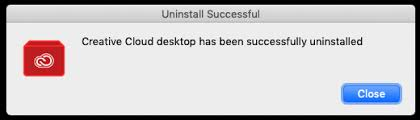
- Wait For Confirmation. Once the process is finished, a confirmation message will appear. You must click the Close button when that happens. Then, you’re done on how to uninstall Adobe Creative Cloud on Mac – for the main app, that is.

If you cannot locate the Uninstaller on the Mac computer or if error messages are displayed when deleting Adobe CC, the best thing you should do is to grab the latest version of the uninstaller of Adobe Creative Cloud. This can be found on helpx.adobe.com. When you have downloaded the file, you can simply extract it. After that, open the uninstaller.
Every Mac has different security settings. That’s why an alert may pop up asking if you really want to open this uninstaller. Press the button for Open in order to proceed. Then, follow the instructions on the screen in order to implement how to uninstall Adobe Creative Cloud.
Now, the last main thing you should do is to remove the leftover files from the system. This is because the dedicated uninstaller of Adobe CC won’t remove the residual files on your Mac computer. These leftover files are still hiding within your system folders and files. That’s why you have to remove them to complete how to uninstall Adobe Creative Cloud on Mac. Here’s how to do it:
- Visit Go To Folder. The first thing you should do is to visit the Go To Folder. This can be found within the Go menu of your Mac’s Finder.
- Paste The Right Directory. The next step is to go to the box and paste “~/Library” within it. Then, press the Go button.
- Look For Related Folders And Files. Now, look for files and folders that are related to the Adobe CC application. Move them towards the Trash. After that, you should empty your Trash.
- Repeat Steps. Repeat the steps for the folders below:
- ~/Library/Preferences
- ~/Library/Application Support
- /Library/LaunchAgents
- /Library/PriviledgedHelperTools
- /Library/LaunchDaemons
Important Note: You should be careful about removing files that are important to the proper functioning of your system. If you delete these important files, it may lead to a total system crash. Your Mac won’t run properly.
By this time you have completed the manual process on how to uninstall Adobe Creative Cloud on Mac. It’s definitely boatloads of work, isn’t it? The best thing is, there’s a faster way to do it. We’ll teach you how to do so below.
Part 3. How to Uninstall Adobe Creative Cloud without Uninstalling Photoshop?
Here, we will discuss the easy way on how to uninstall Adobe Creative Cloud. This automatic method is very easy that you only have to do a few simple clicks. Plus, you can keep the Photoshop app if you want to. We will be using a tool called PowerMyMac.
PowerMyMac helps to remove unwanted files from your system. It helps to optimize Mac computers by freeing up a lot of space. Plus, it helps remove apps without leaving any residual files. Some of the features of PowerMyMac include the following:
- It helps to manage your plugins and startup items. Thus, it boosts the startup or bootup process of your Mac.
- It helps to manage your privacy online. This is done by removing browser history, cache, browser logs, cookies, and more.
- It helps to scan and remove unwanted junk from your computer. This results in freeing up a lot of space within your system.
- It helps to check your system status including CPU resources, RAM, etc.
- It helps to remove apps from your system. Total removal will be done as residual traces won’t be left behind.
Here are the steps to use PowerMyMac on how to uninstall Adobe Creative Cloud on Mac:
Step 01. Download And Install PowerMyMac
Download PowerMyMac from its website on powermymac.com. Follow the instructions on the screen to install PowerMyMac. After it is installed, you can open it on your Mac computer.
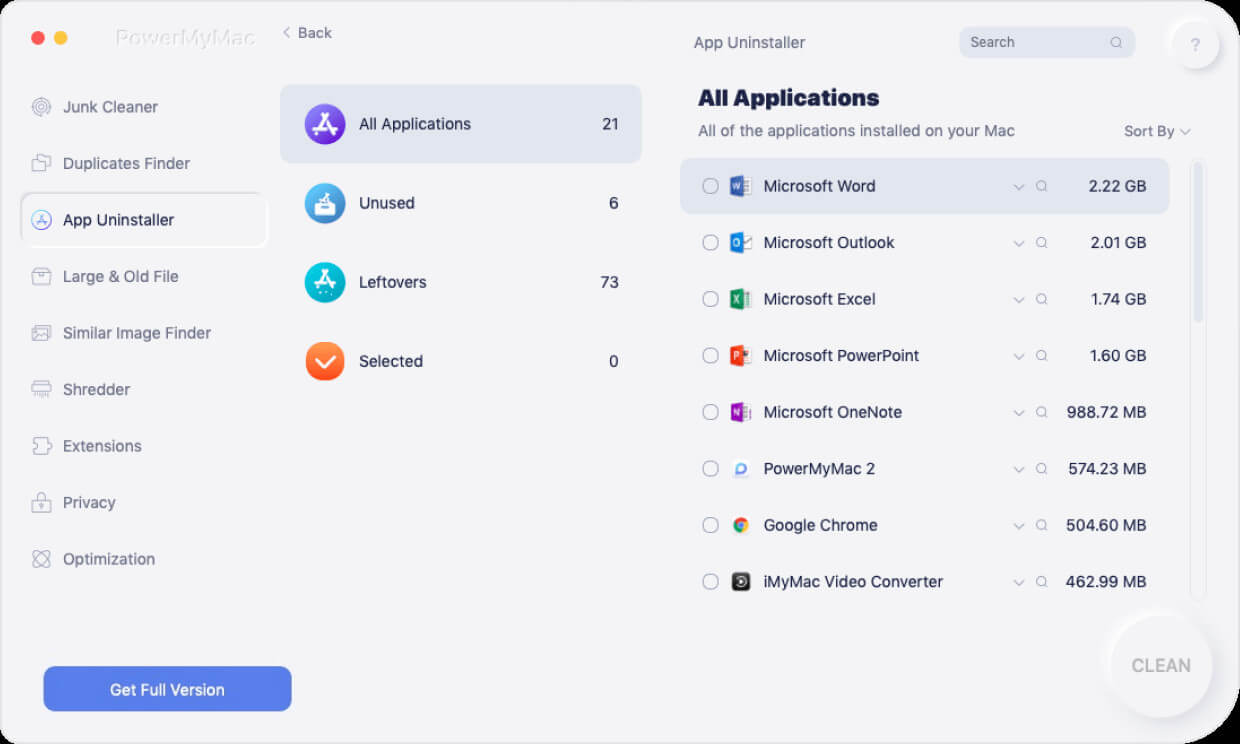
Step 02. Check System Status And Click App Uninstaller
Check out system status once the app is opened. Then, click the App Uninstaller module at the left sidebar. It is near the bottom of the list. Then, click the SCAN button at the bottom center part.

Step 03. Wait For Results And Preview
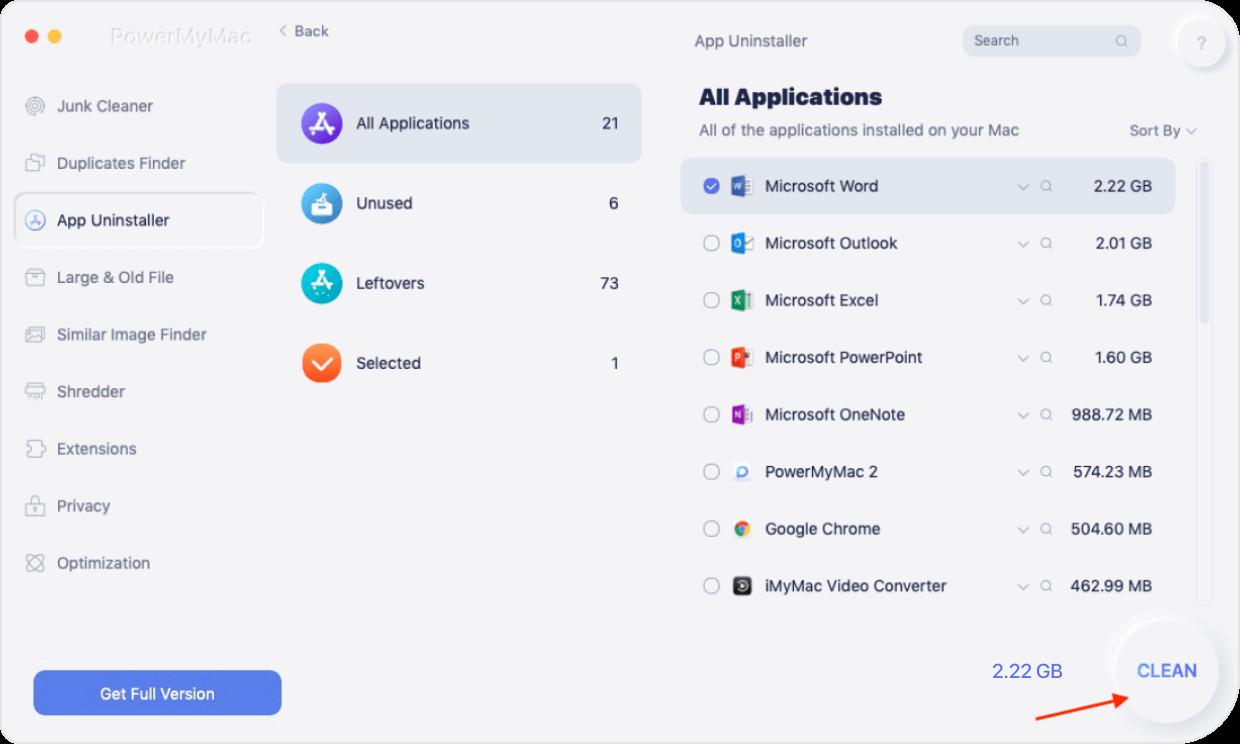
Wait for the scanning process to complete. A list of apps installed on your Mac will be shown. Simply select and preview the apps you want to uninstall. Its files will be shown on the right side of the screen.
Step 04. Click the CLEAN Button To Clean Up
Click the CLEAN button within your Mac. After that, wait for the Cleanup Process to complete. PowerMyMac will show a window that the cleanup process is done.
Here, we have discussed how to uninstall Adobe Creative Cloud on Mac. We taught you the manual version of doing so – which is a tedious process. That’s why we recommend that you use PowerMyMac. It’s a powerful tool to totally remove apps with their leftover files. For ways to uninstall other apps on mac, refer to the articles provided by the link. Grab PowerMyMac now!


