
Skype is a very popular platform for instant messaging, audio calls, and also video calls. Its competitors include Zoom and Slack. It’s a very known tool and is now bought and managed by Microsoft itself. However, it’s not as great as it used to be. There are bugs and it’s quite slow now.
That’s why you may want to know how to uninstall Skype on Mac easily and completely. In this way, you can focus on using one type of instant messaging and video call app. In addition, you can free up more space within your computer.
We will tell you how to uninstall and then reinstall Skype on your Mac. One thing we will focus on is Skype Business For Mac. This will help you have more space on your computer. It may also speed up your Mac if you have a lot of storage space that’s free. Let’s get started with how to uninstall Skype on Mac and how to reinstall it. If you have any questions about deleting other apps on the Mac, you can get answers in the linked article.
Part 1. How To Uninstall And Reinstall Skype On Mac?
Here, we will discuss how to uninstall Skype on Mac. Then, we will teach you how to reinstall it. Uninstalling Skype on Mac can be tricky. That’s because leftover files will be left. These can be difficult to find and remove. Check out the steps on how to uninstall Skype on Mac below:
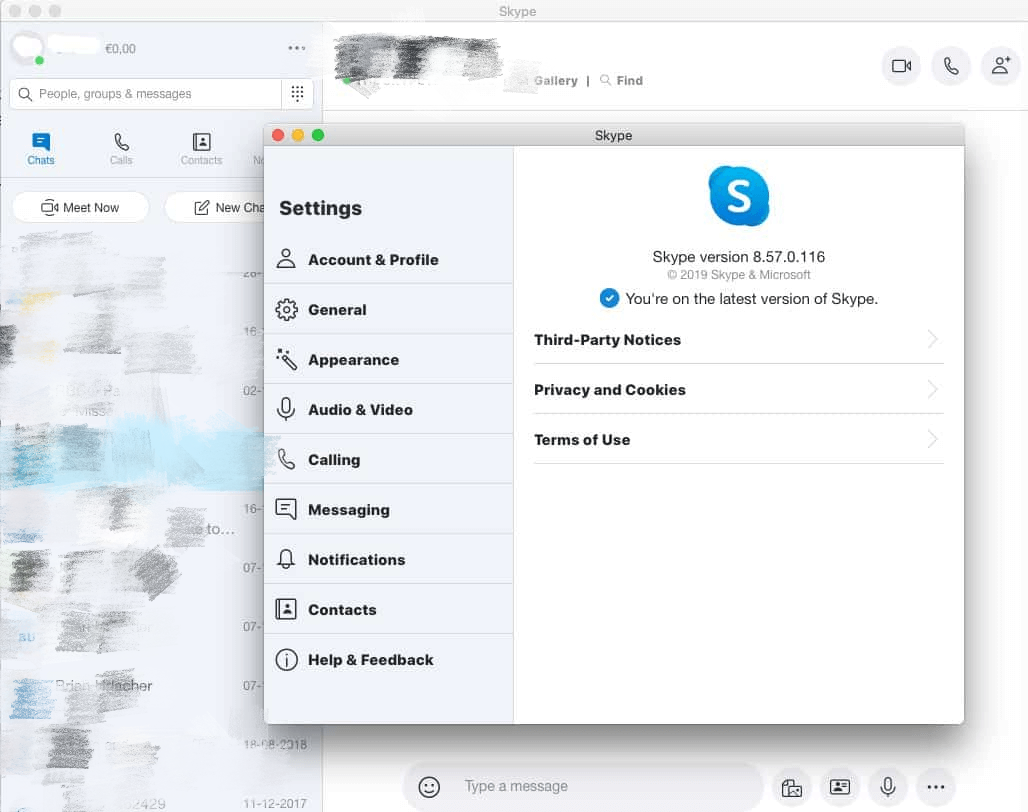
- Quit Skype. The first thing you have to do is to quit the app Skype on your computer. Do this by clicking the menu on the upper left part of the interface. Then, click the option to Quit Skype. An alternative thing you can do is to use the shortcut on your keyboard. To do this, press the CMD + Q buttons on your computer simultaneously. If you’re having a hard time quitting the app, you can Force Quit the app on Activity Monitor.
- Delete Skype. Go to the Applications folder within your computer. Find the Skype application on the list. Drag the icon towards the Trash and drop it.
- Empty Trash. The next thing you have to do is to go to Trash and empty Trash.
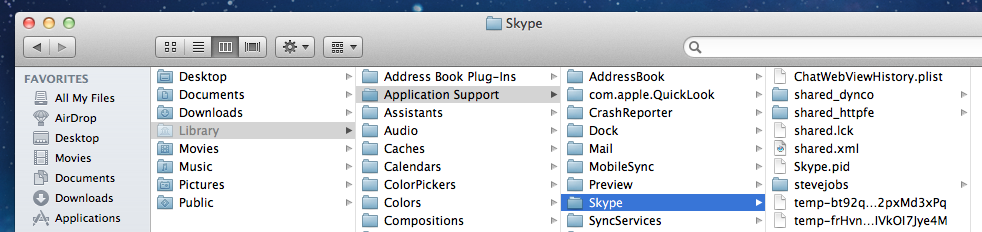
- Optional - Delete Skype From Your Application Support Folder. You should go to Spotlight Search in order to locate this folder. Once on Spotlight, you will type the following without the quotation marks, “~/Library/Application Support”. After that, press Enter. This will direct you to the folder where files for applications are put into storage. Now, find the folder for Skype and then move it towards the Trash. It is important to note, that this step will delete your call history and chat history on Skype. If you want to make sure these histories are kept, you should not do this step.
- Delete Other Associated Files. The next thing you should do is to delete associated leftover files. Visit Spotlight again to do this. Type the following without quotation marks, “~/Library/Preference”. After that, press the Enter key. Type out the word “Skype” within its search box. It will display associated folders. Drag these folders towards the Trash. You have to make sure that your filter uses “Preferences”. It should not be “This Mac”.
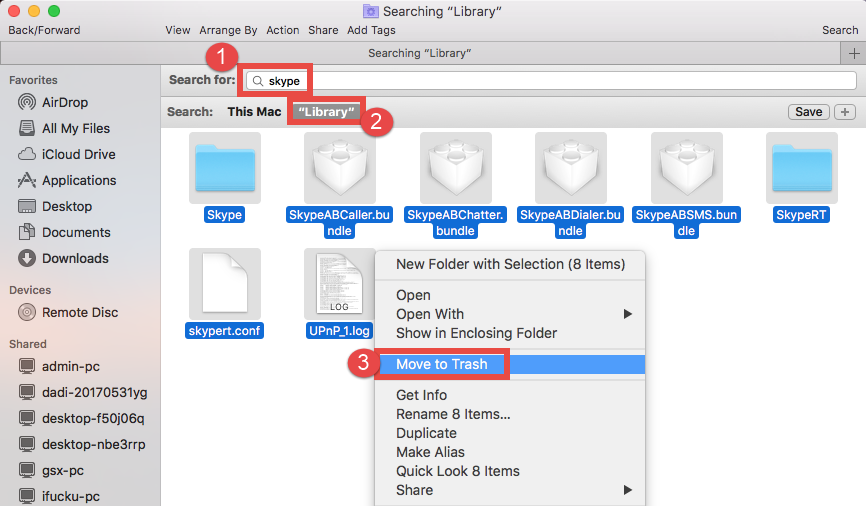
- Final Check. The next step is to launch the Finder application within your Mac. Go to the search bar and type out “Skype”. Then, check if other associated files are left. Move all these files towards the Trash.
- Empty Trash. The last step on how to uninstall Skype on Mac manually is to empty your Trash in the Mac computer.
Reinstall Skype On Mac
After you have done the process on how to uninstall Skype on Mac, you may want to reinstall it. This process is very easy to do. We will teach you how to reinstall the Skype application on your Mac. Check out the steps below:
- Visit The Website. The first thing you have to do is to visit the website of Skype. This can be found on Skype.com.
- Go To The Downloads Section. From the menu of the website, you should go to the Downloads section.
- Download Skype For Mac. After that, you have to go for the option that says “Get Skype For Mac”. A pop-up window will appear on your computer. You can choose where to save the file if the computer asks you to.
- Launch The Installer. When you have finished downloading, launch the installer. Then, follow the prompts on the screen in order to install Skype on your Mac.
- Drag Towards Applications Folder. Now, after the installation process, you should drag the icon for Skype. Drag it towards the Mac computer’s Applications folder.
- Check The Download Process. Now, a new window will show up. It will display the process of downloading the app. Once this is done, the Skype icon will show up on your Desktop. It will also show up in the Applications folder.
- Launch Skype. Open Skype by clicking the icon twice.
Now, you have finished the processes on how to uninstall Skype on Mac and how to reinstall it back again. How about Skype For Business? Our article will be telling you the steps on how to implement this below:
Part 2. How To Uninstall Skype For Business On Mac?
Now, let’s talk about how to uninstall Skype on Mac, specifically the Skype For Business On Mac. The steps to do this can be found below:
- Open The Computer. The first thing you have to do is to launch your computer. Then, you should log into it. Make sure you’re using the credentials for the administrator account.
- Close Skype For Business On Mac. Make sure you close the Skype For Business On Mac within your computer. Make sure all processes connected to it are closed as well. You can find it on the Activity Monitor.
- Drag Towards Trash. The next thing you have to do is to drag the Skype For Business On Mac towards the Trash.
- Empty Trash. After that, you’d have to empty the Trash on your computer.
- Remove Associated Files. Part of the steps you have to do is to remove the preference files of your Skype. In order to do this, you have to launch Terminal within your computer. After that, you have to put the commands below one by one on the Terminal:
- find -f /private/var/db/BootCaches/* -name "app.com.microsoft.SkypeForBusiness*" -exec sudo rm -rf {} +
- rmdir ~/Library/Application\ Scripts/com.microsoft.SkypeForBusiness
- sudo rm -rf /private/var/db/receipts/com.microsoft.SkypeForBusiness*
- rm -rf ~/Library/Cookies/com.microsoft.SkypeForBusiness*
- rm -rf ~/Library/Application\ Support/com.apple.sharedfilelist/com.apple.LSSharedFileList.ApplicationRecentDocuments/com.microsoft.skypeforbusiness*
- rm -rf ~/Library/Application\ Support/CrashReporter/Skype\ for\ Business_*
- rm -rf ~/Library/Preferences/com.microsoft.SkypeForBusiness.plist
- rm -rf ~/Library/Saved\ Application\ State/com.microsoft.SkypeForBusiness.savedState
- rm -rf ~/Library/Logs/DiagnosticReports/Skype\ for\ Business_*
- rm -rf ~/Library/Containers/com.microsoft.SkypeForBusiness
- defaults delete com.microsoft.SkypeForBusiness || true
- sudo rm -rf /Library/Internet\ Plug-Ins/MeetingJoinPlugin.plugin
- sudo rm -rf /Applications/Skype\ for\ Business.app
- Launch Keychain Access. The next thing you have to do is to open the Applications folder within your Mac. Then, you have to go to the Utility folder. After that, you have to open the Keychain Access window.
- Remove Skype For Business. Go to the logon keychains part and then choose Skype For Business. After that, you should delete it.
- Empty Trash. The final thing you have to do is to Empty Trash.
Part 3. Quick Way To Remove Skype Or Skype For Business From Mac
Now, we will teach you how to uninstall Skype on Mac easily. The process on how to uninstall Skype on Mac will be very easy if you use the PowerMyMac tool. You can also use the PowerMyMac tool to delete Microsoft Office on Mac. We’ll teach you how to use this tool, which is a very easy thing to do.
Here are the steps you should follow to implement how to uninstall Skype on Mac:
Step 01. Download, Install And Open The Tool
The first thing you should do is to download the tool from its website. You should install it afterward. Then, open the tool on your computer.
Step 02. Click Uninstaller On the interface
Then, you’d have to check out the modules on the left part of the interface. After that, you shod click Uninstaller.

Step 03. Scan And Preview Results
The third step is to click the Scan button on your computer. This is found on the bottom central portion of the screen. After that, wait for the scanning process to complete. Then, check out the results.
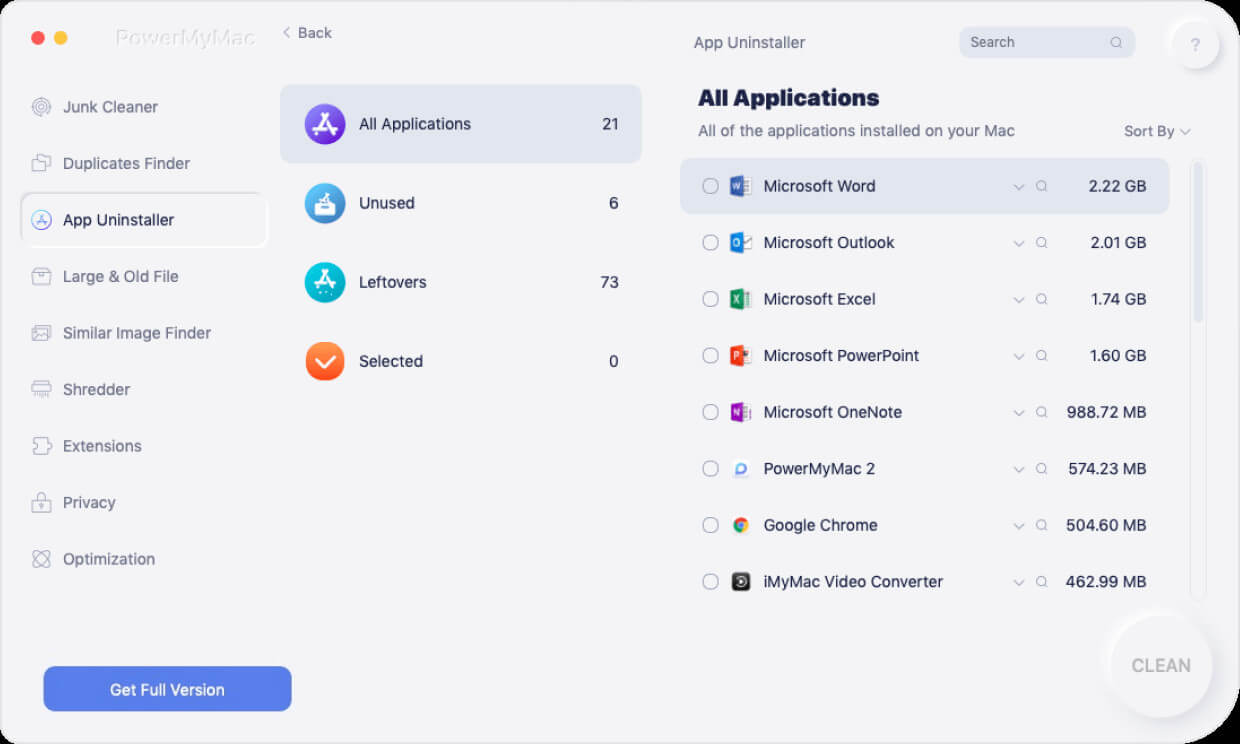
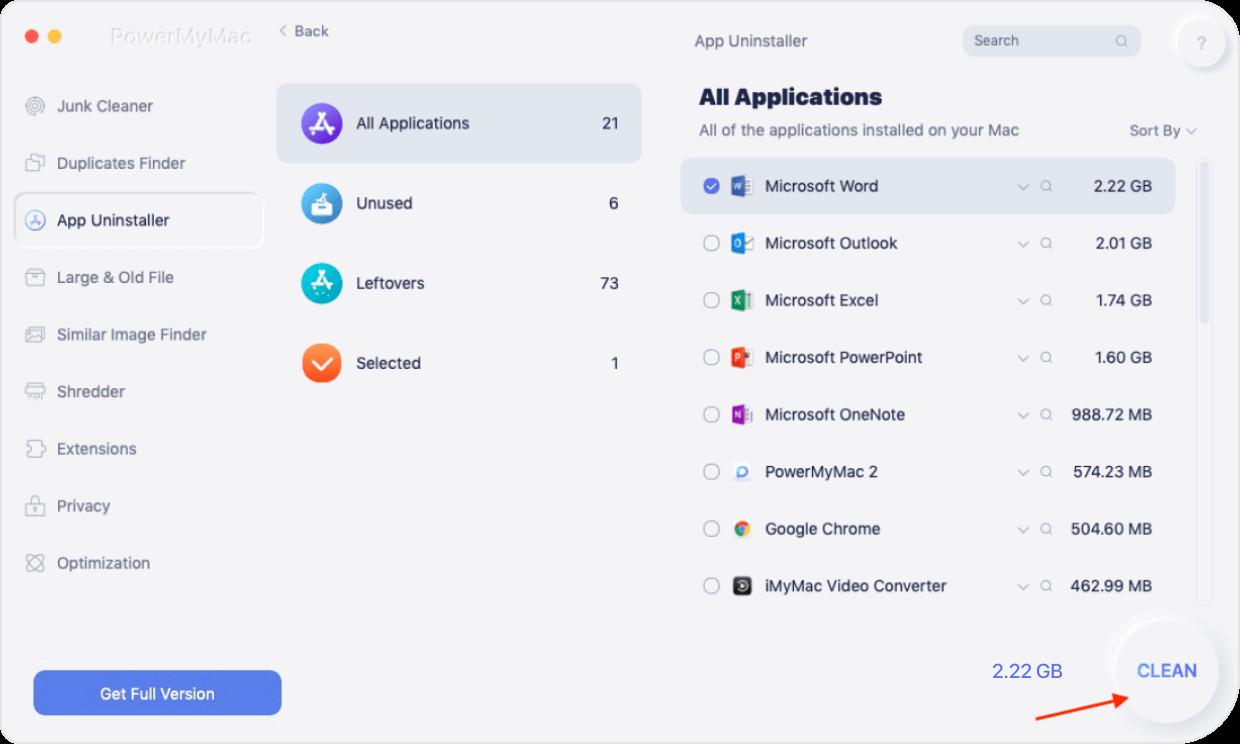
Step 04. Select Skype From The List
After that, you should select Skype from the list that shows up. Make sure you check out the files you want to delete on the right side of the computer.
Step 05. Click The Clean Button On The Interface Of PowerMyMac
The last part is to click the Clean button on the interface of PowerMyMac. This will help you on how to uninstall Skype on Mac on your computer. You can use it for the Business version as well.
We have told you how to uninstall Skype on Mac on your computer. We’ve also taught you how to remove the Business version. The best thing you have to implement is PowerMyMac’s Uninstaller tool. This is a great way to remove the files totally without leaving traces.


