
Why should you learn how to flush DNS on Mac? When you use the internet on your Mac, you leave up tons of traces. This is because those web developers use caches and JavaScript so that they can have a record of how you use their website. They do this so that they can be able to optimize their website without the need of getting the personal details of those who visit their website. That is why a lot of Mac users tend to rely on using blockers from JavaScript for them to be able to clear up their cookies and as well as their history.
But, on the other hand, there are so many users as well do not know that these types of software save up a lot of information such as DNS caches which contains the history of the websites that you visited. And because of this, it could be one of the reasons why when you use the internet on your Mac, it could act up so slow and the only thing that you need to do to get this fixed is to flush DNS on Mac.
Part 1. What Is DNS Cache on Mac?
Before we go ahead and show you the tricks on how to flush DNS on Mac, it is a must that you know facts about it first.
What Are DNS Caches?
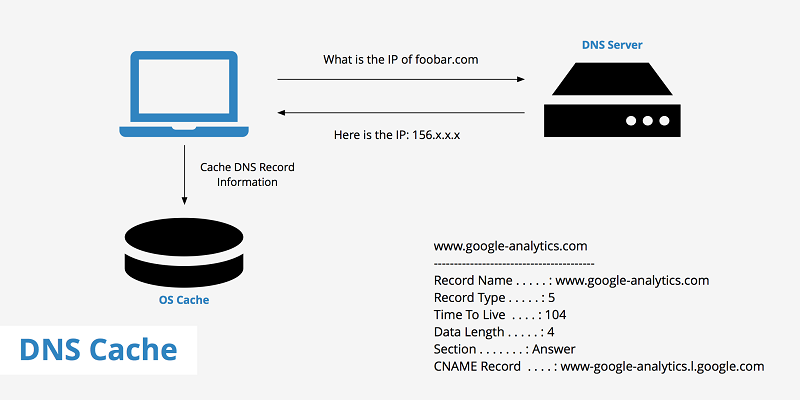
DNS serves are the ones who are responsible for converting the name of a certain website that you visit and turns it into a numerical address so that it can be processed by your Mac. So, whenever you try to visit them again using your web browser, they are also accessed. This is the reason as to why the loading time of the webpage sometimes takes up longer.
What Does DNS Caches Contain?
DNS caches usually contain resource records and they will be shown on your screen in an ASCII code. Aside from that, the DNS cache also contains the IP address of the domain or the host and some other information like the validity or the right protocol group.
When Should You Flush DNS on Mac?
Once that you are experiencing that you can no longer use or open any browser on your Mac, then flushing the DNS cache can be a great help. Also, knowing how to flush DNS on Mac can help you solve several issues that you might be experiencing.
Part 2. Why Do We Need to Flush DNS on Mac?
Cleaning up the DNS caches on your Mac should be one of the regular habits that you should have. And with that, there are a couple of reasons as to why you need to flush DNS on Mac from time to time. And with that, here are some of the reasons as to why you need to flush DNS on Mac.
- One reason as to why you need to flush DNS on Mac is for security purposes. The information that contains your cache is good when it comes to delivering web projects. However, this can become a bit dangerous. It is because when hackers have an access to your DNS cache then there is a way for them to manipulate it and send them over to a different website.
- Another reason as to why it is an advantage for you to flush DNS on Mac is because it is a great way on how you can fix some common problems that you might be encountering on your Mac computer.
- DNS caches can give you a strong target for your data collector. As long as you have the list of address which includes some other information like validity period, then you can have an overview of the history of your page.
Part 3. How Do I Flush DNS on Mac Quickly?
If you are wondering about the easiest way on how you can flush DNS on Mac. Then we have the perfect solution for you. For you to know how to flush DNS on Mac, the easiest and the most effective way, you will be needing to use a powerful tool as well. And lucky for you, we have the perfect tool that you can use and that is no other than the PowerMyMac.
The PowerMyMac is an all-in-one powerful tool that you can use for you to clean up space on your Mac, and at the same time, fix some minor problems that you might be encountering on your Mac such as slow performance. And one problem that you can solve using the PowerMyMac is on how to flush DNS on Mac.
Aside from that, the PowerMyMac is great for cleaning up storage space on your device because it can easily get rid of those junks files that you have, including those unwanted files that you have. You can also clean up other sorts of junk files such as your system junk, photo junk, email junk, similar photo, trash bins, large and old files, duplicate files, and your iTunes junk.
And, of course, once that you can clean up all of those unwanted files from your Mac, whether it is your junk files or your DNS, your Mac will then be functioning as the first time you bought it because it was able to remove all the burdens that it has.
Now, for you to be able to see how easy to use the PowerMyMac on flushing your DNS on your Mac, here is a very quick tutorial that you can refer to for you to complete the process.
Step 1. Launch PowerMyMac and Select Toolkit Tab
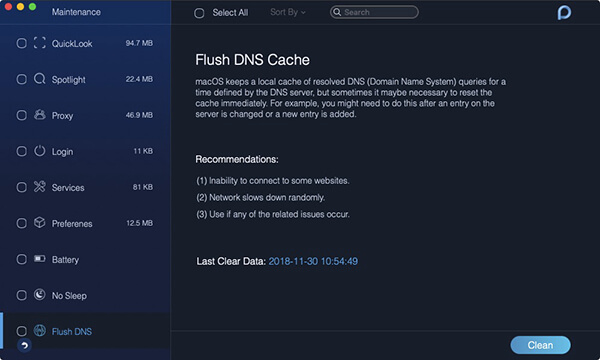
Step 2. Choose Maintenance Option
The Maintenance option is a feature that you can use for you to have your Mac be optimized and take out those settings that you do not use anymore. This way, you will be able to improve the speed of your Mac computer. This is also the feature wherein you can flush DNS on Mac.
Step 3. Scan Your Mac
Step 4. Choose Flush DNS, then flush DNS on Mac
Tip: The current version does not support the above function temporarily, but a special software that supports the following function will be released in the future.
Part 4. How to Flush DNS on Mac Manually?
Aside from using the PowerMyMac tool to flush DNS on Mac, it is also a great idea that you know how to flush DNS on Mac manually. But before doing the whole process, you have to close your browser first because this will interrupt you using any browser o your Mac. And once that you have close your web browser, go ahead and follow the instructions below on how to flush DNS on Mac.
- On your Mac, go ahead and open your LaunchPad and then look for Terminal using the search bar.
- And once that you have launched Terminal on your Mac, go ahead and enter the following command: Sudo killall -HUP mDNSResponder; sleep2;
- And after entering the command, go ahead and press on the Return button.
- And then, key in your password and then press on the Return button once more.
- After that, you will then be able to see a message on your screen saying that your macOS is about to reset your DNS cache. This means that the process of flushing your DNS cache on your Mac will then start and just wait for it to finish.
- And once that the process is all done, simply close your Terminal application on your Mac.
NOTE: The above steps, especially the command used are designated for those Mac that is running on macOS Catalina and Mojave. But if you are using a different version, then you will be needing to use a different command. With that, here are the commands that you should use depending on the version of the Mac that you are using.
- To flush DNS on macOS Sierra the command that you should be using is this – sudo killall -HUP mDNSResponder; say DNS cache has been flushed.
- For you to flush DNS on macOS X El Capitan and Yosemite, here is the command that you should be using: sudo dscacheutil -flushcache; sudo killall -HUP mDNSResponder; say cache flushed.
Though the command that you should be using depends on the version of Mac you are using, the steps on how to flush DNS on Mac manually is still the same. The only thing that you are going to change is the command for flushing the DNS cache on your Mac.
Part 5. Conclusion
Once that you know how to flush DNS on Mac, this will automatically update your entry that is connected to the address of the server you are working on. And once that you try on going to the same server, the loading time can take a little longer just like cleaning up the cache of your browser on your Mac.
And flushing the DNS cache on your Mac is typically done once in a while. However, doing so can help you fix several issues with the server that you are trying to work on with. Also, you have to make sure that when you know how to flush DNS on Mac, you have to make sure that you are going to use the correct command for it just like what we have shown you above. But in case that you wanted to do this process the safest and the easiest way, then you can go ahead and rely on using the PowerMyMac because this is one effective and the best tool that you can use for you to flush DNS on Mac easily.


