
Clearing up storage space on your Mac is one of the habits that you should do every now and then. This way, you will be able to prevent your Mac from experiencing minor issues such as a slow down on performance, freezing, and lagging every time you are using it. Also, cleaning up your Mac and taking out all of the files and other things that you no longer need can help you free up storage space. This way, you will be able to save more files that are important. So, how to clear storage on Mac?
However, cleaning up your Mac is not that easy because it will take you a lot of your time to clean it up. Especially if you haven’t clean up your Mac in ages or if you are not familiar with where you should go to find the files that you really don’t need.
We know the struggle, that is why we have here solutions and an easy and quick guide on how to clear storage space on Mac. From here on, all you need to do is to read through this post and we are sure that you will be guided on how to clear storage space on Mac in no time.
Part 1. How Do I Free Up Disk Space on My Mac?
As we have mentioned earlier, cleaning up your Mac is not that easy, but not too difficult for you to do. However, it can take you forever in doing so especially if you are not familiar with your Mac, or if this is the very first time that you are going to clean up your Mac ever since you bought it. Now, that sounds like a lot of things to do, right?
Luckily, we have here the most powerful and efficient tool that you can use in order for you to clear storage space on Mac easily. And that is the all-new PowerMyMac tool.
The PowerMyMac is a third-party application that you can use for you to clean up tons and tons of files that you actually no longer need or use and just sitting there wasting your precious storage space. By using the PowerMyMac, you can also delete those applications that you no longer use, optimize your external hard drive, protect your private files, and of course, speed up the performance of your Mac with just a few clicks.
Using the PowerMyMac, you can delete those junk files that us piling up on your Mac – and we are sure that you have like a bunch of them on your system. Through this, you can clean up your iPhoto junks, email junks, system junks, similar photos, duplicate files, large and old files, and more. It can also uninstall those apps that you wanted to get rid of by using its uninstaller feature.
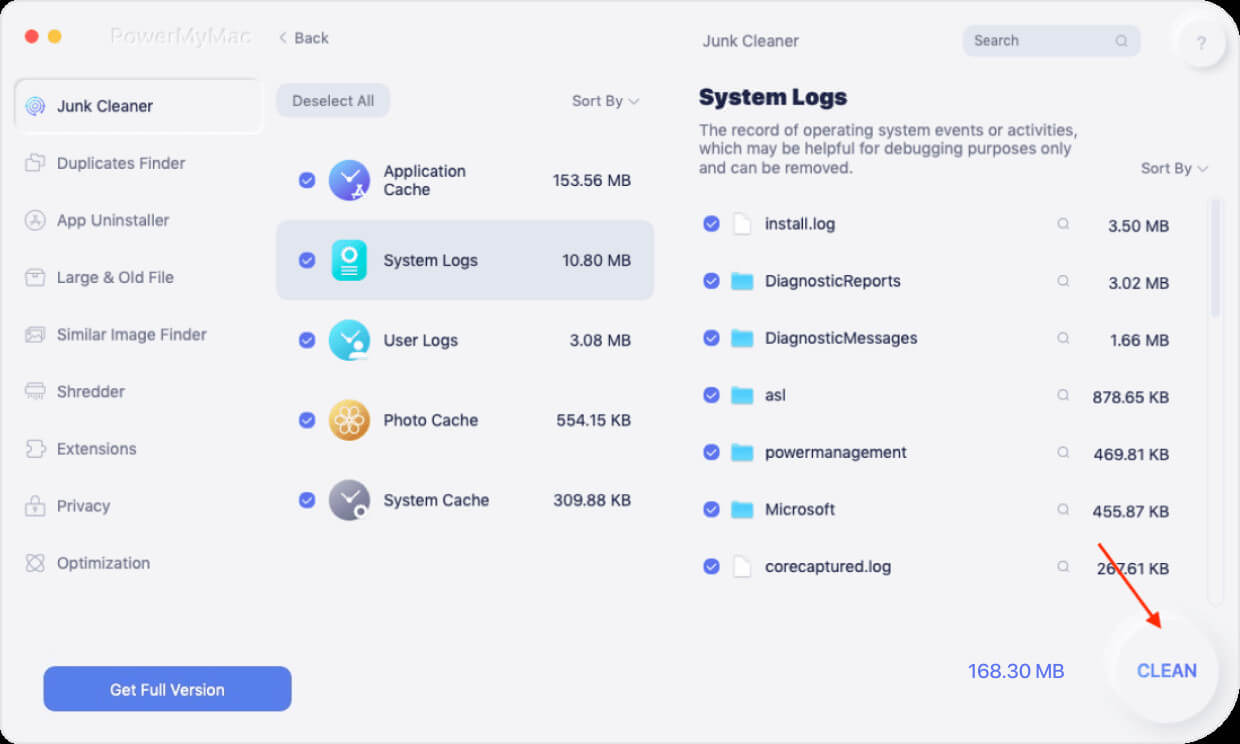
Now, using the PowerMyMac is super easy and we are going to show you a quick guide on that below. Let us go ahead and show one feature that you can use in order for you to clean up your Mac and that is by cleaning up your System Junk. But do not worry, because cleaning up those other junks are pretty much the same with the process that we are going to show you below.
Step 1. Launch PowerMyMac on Mac, and Check The System Status

Step 2. Choose Master Scan, then Scan Your System Junks on Your Mac

Step 3. Choose Files to Remove and Clean Up Junk Files on Mac
NOTE: As for the other cleaning functions under PowerMyMac, you can also do the same steps as what we have shown you above. The only difference is that you will choose another cleaning feature to do so you can clear up storage on your Mac.
Part 2. How to Clear Storage Space on Mac Manually
Aside from using the PowerMyMac, there are also different ways on how to clear storage space on Mac. And these options can be done manually. Always remember that being able to familiarize yourself with your Mac by doing some manual fixes is also a good thing. Because by doing a manual clean up on your Mac, you will be able to check those files closely so you can determine more if you want to remove them from your Mac or not. However, this could take a long time so you have to patient.
Clear Your Cache Files
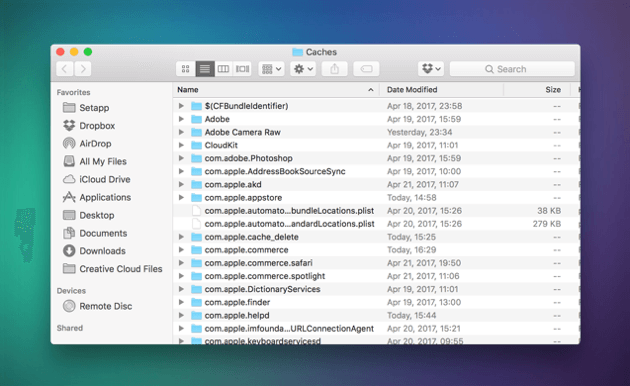
Your cache files are the ones who are responsible for accessing some programs on your Mac easily and faster. However, piling up cache files can result in some minor problems to your Mac because having too much is not good at all. That is why this is one thing that you should try to Clear Storage space on Mac. Here is how you can do so.
- Go ahead and launch the Finder app and then click on the Go button from the menu bar.
- And then, go ahead and simply click on the Go to Folder.
- And then, enter ~/Library/Caches. And then, go ahead and delete on the file or the folder that is taking up a lot of space on your Mac.
- After that, go ahead and click on Go to Folder option.
- And then, enter /Library/Cache and then delete the folder and files as well that is taking up too much space on your Mac.
Delete Your Localization Files
Localization files contain the different languages that each of your applications has. After all, each app that you have does not contain only one language, right? So, for those languages that you no longer need, it is better if you take them all out of your Mac to Clear Storage space on Mac.
- On your Mac, go ahead and launch the Finder app.
- And from there, simply click on Applications.
- And then press the Ctrl button and then click on the application that you want to work on with.
- And then, click on the Show Package Contents option.
- And from there, choose Contents and then choose Resources. And from there, go ahead and look for all the files that come with an ending extension of .|proj.

Delete Both Your Old iTunes and iOS Backups
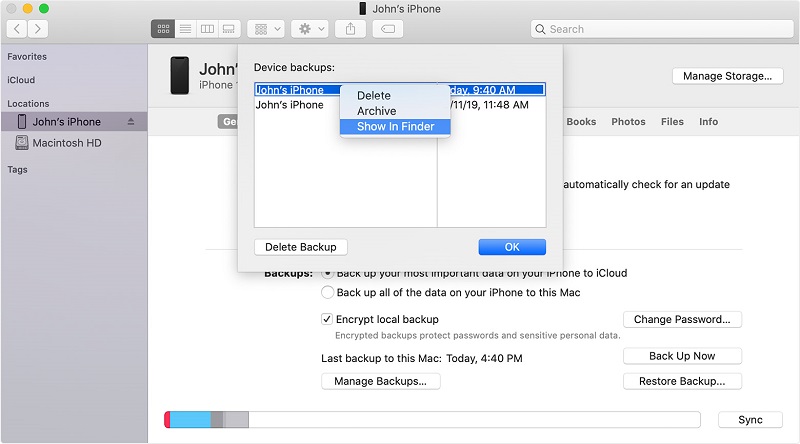
Of course, one of the purposes that you use your Mac is by using it as a means of backing up other iOS devices that you have. And those backups could be your iTunes or your other iOS backups. Pretty sure there are some old backups that you no longer need so might as well remove them from your Mac to Clear Storage space on Mac.
For Deleting Old iTunes Backup
- Go ahead and launch the Finder tool on your Mac.
- And then, click on the Go button located at the menu bar.
- And from there, click on Go to Folder option.
- And then enter the following path: ~/Music/iTunes/Previous iTunes Libraries
- And then delete those old iTunes backups that you no longer need.
For Deleting Old iOS Backup
- Go ahead and click on the Finder application on your Mac.
- And then, click on the Go button from your menu bar.
- And then choose the Go to Folder
- And then enter ~/Library/Application Support/MobileSync/Backup
Uninstall Application That You No Longer Use
Applications on your Mac can also take up a lot of storage space especially if you have a lot. And because of that, you might want to consider getting rid of those that you no longer need. But when you remove those apps, make sure that you get rid of them the right way. So, you have to go through your apps and uninstall them including those files that are associated with the apps that you are going to uninstall.
Empty Your Trash Bin
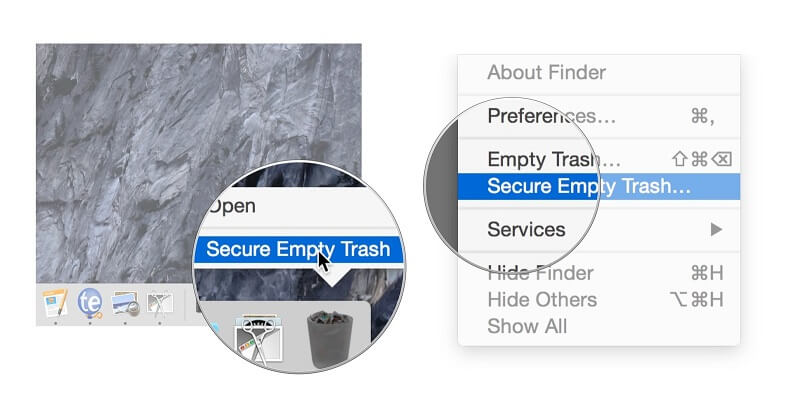
This may sound a little basic but this actually helps when you want to clear storage on your Mac. You might not notice that your Trash Bin already contains a lot of files that you tried to remove from your Mac. And if you do not completely delete them from your Trash Bin, then they are still taking up storage space on your Mac. So, for you to be able to do that, here are the steps that you need to follow.
- On your keyboard, go ahead and press the Ctrl button and then click on your Trash from your Dock.
- And then, go ahead and click on the Empty Trash button.
- And then, go ahead and choose Empty Trash.
Part 3. Conclusion
Knowing how to clear storage space on Mac is one great way for you to be able to have more files to save that is way important than those of the old ones that you have. And with that, there are a lot of ways on how to clear storage space on Mac. But the best way for you to do this is to use the PowerMyMac and surely you will be able to Clear Storage space on Mac easily.


