
BlueStacks is one of the most popular emulators for the Android operating system. It is available on both Mac and Windows computers. It’s a great way to run Android apps on Windows PC and Mac computers. Sometimes though, they’re known as a threat by security software.
That’s why you may want to know how to uninstall BlueStacks on Mac. In addition, you may want to make sure leftover files are not left within your system. That’s because it may slow your system down. And, it takes up a lot of space as well. In addition, please refer to another article about uninstall other apps on mac.
Here, we will discuss how to uninstall BlueStacks on Mac. This will help you improve the performance of your system. Plus, it will free up storage space. You can use this storage space in the future for important files and documents.
Part 1. Is BlueStacks Safe For Mac?
Before we teach you how to uninstall BlueStacks on Mac, we will talk about whether it’s safe for your Mac computer. Actually, there are doubts as to whether the app is safe. This is because McAfee and Avast say that BlueStacks is a threat.
That’s why Mac users question the actual safety and security of the software. There are people who used another emulator. There are those who still stayed with BlueStacks.
However, is BlueStacks actually safe for Mac? To state a fact, it’s actually normal for security software to detect BlueStacks as malware. This is because it’s a third-party app. According to computer experts (or probably nerds), this is what you call false detection. It doesn’t mean BlueStacks is bad for your Mac computer.
In addition, the app will prompt you to deactivate security software during the installation process. This is also one reason why the app is considered to be unsafe. But that doesn’t mean it’s actually malware. Deactivating protection is sometimes necessary in order to make sure the process of installation runs smoothly.
That’s why before we teach you how to uninstall BlueStacks on Mac, we will tell you that the program is actually safe. It’s not malware. However, it does consume a lot of space and RAM resources to use. That’s why you may want to remove it (or probably reinstall it back again).
How To Delete BlueStacks Account?
Before we implement how to uninstall BlueStacks on Mac, you may want to know how to delete your account first. This is a good thing if you wish to use another account on your BlueStacks application. Or, you may want to check this other account too.
So, how do you add or remove your BlueStacks account? Here are the steps on how to do it:
- Go To BlueStacks. Now, you’d have to open BlueStacks on your computer first.
- Go To My Apps. The next thing you have to do is to go to the tab labeled My Apps. After that, click the part that says Settings.
- Press Account. The next step would be to press the Account part.
- Find Your Account. Now, click the option that says Google. It will display the Google account that has been added on BlueStacks.
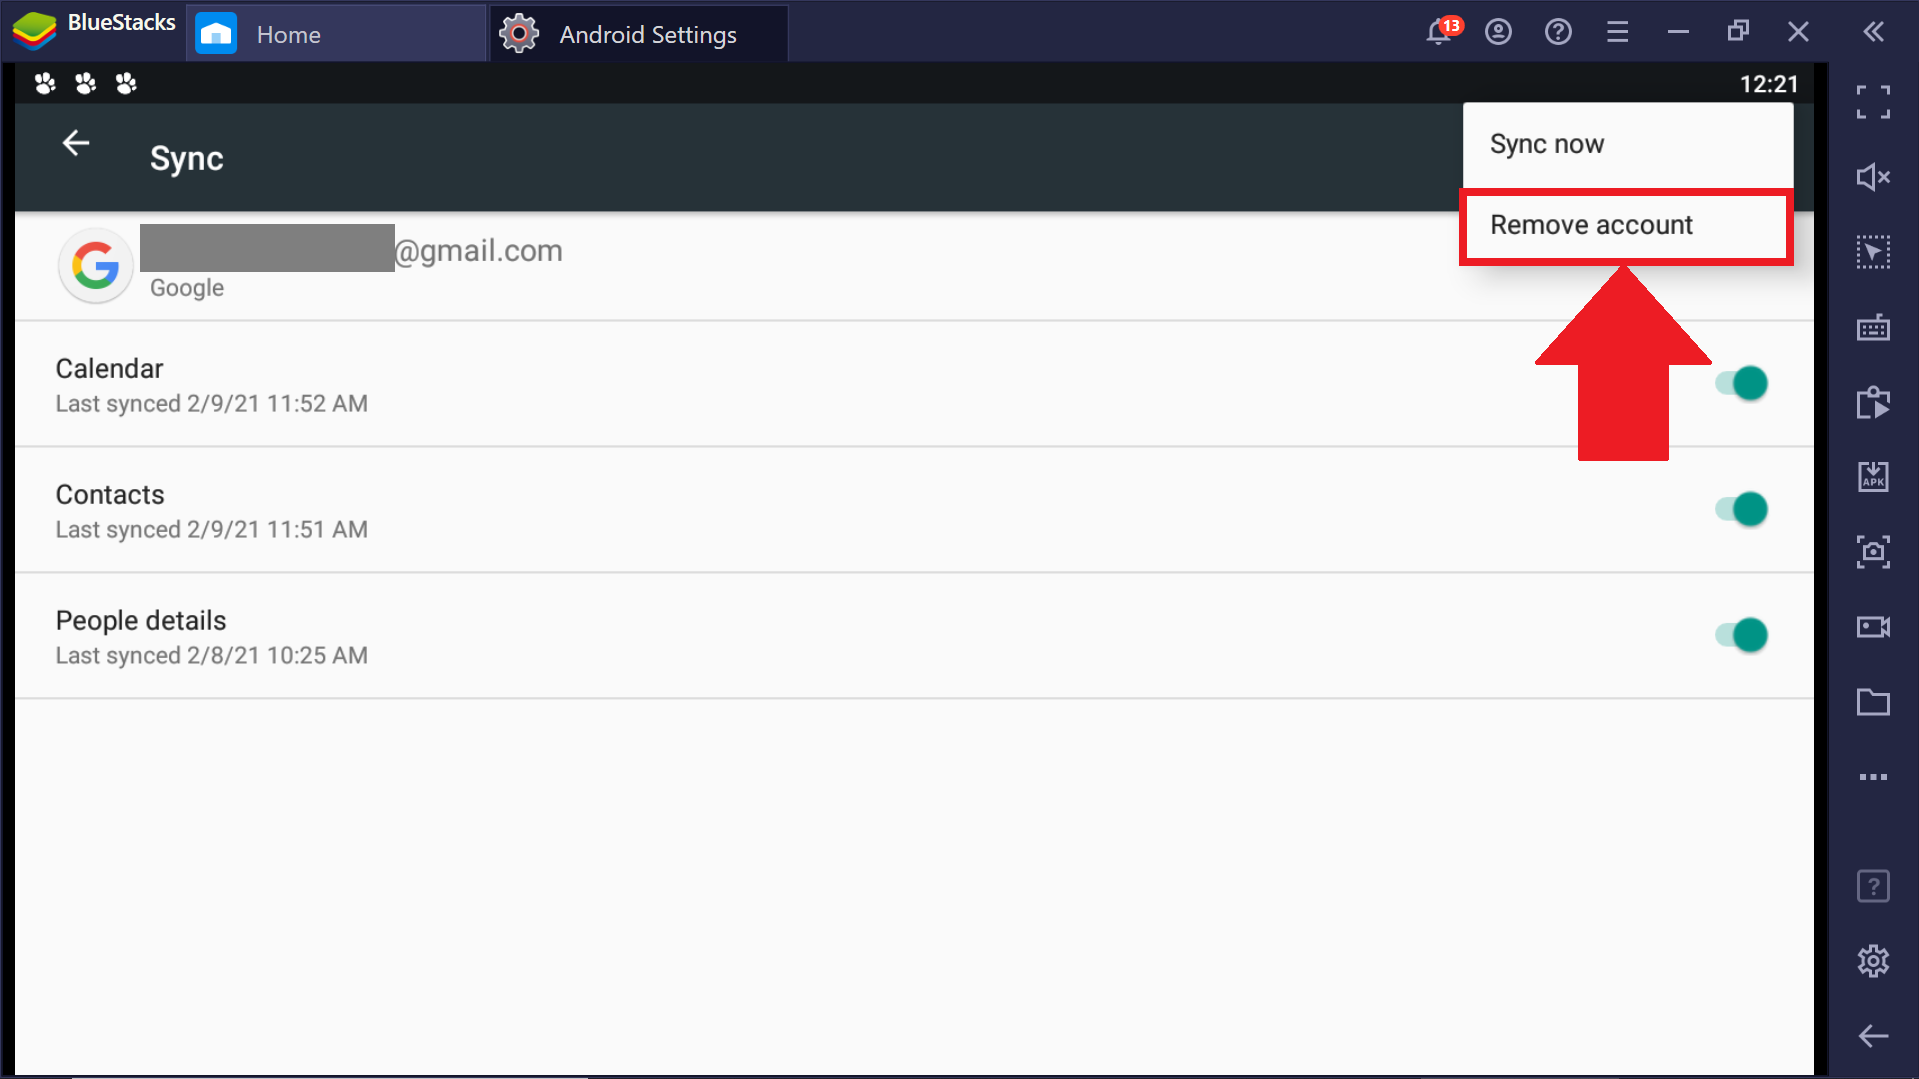
- Choose The Account. Now, choose the account you wish to remove. Then, press the three dots that are located at the upper right part of the interface.
- Remove Account. After that, click the option that says Remove Account.
- Optional – Add Account. If you want to add a new account, you can click the Add Account part. After that, follow the prompts on the screen to place a new account on BlueStacks.
Part 2. How Do I Completely Uninstall BlueStacks On Mac?
Now, we will teach you how to uninstall BlueStacks on Mac completely. This is the manual method of doing so. You will notice that the manual process on how to uninstall BlueStacks on Mac is very cumbersome.
We do not recommend this process because you may mistakenly delete important system files. Plus, these leftover files are very hard to find. Still, we will teach you how to uninstall BlueStacks on Mac manually. Check out the steps below.
- Quit The BlueStacks Application. The first thing you have to do is to quit the BlueStacks application on your computer. You have to make sure that associated apps and processes are excited too. One thing you can do is to right-click the icon for BlueStacks within your Dock. Then, you’d have to click the part that says it will exit the app.
- Quit Associated Processes. After that, click the Activity Monitor in order to stop the associated processes. The Activity Monitor can be found within the menus named Go and Utility.
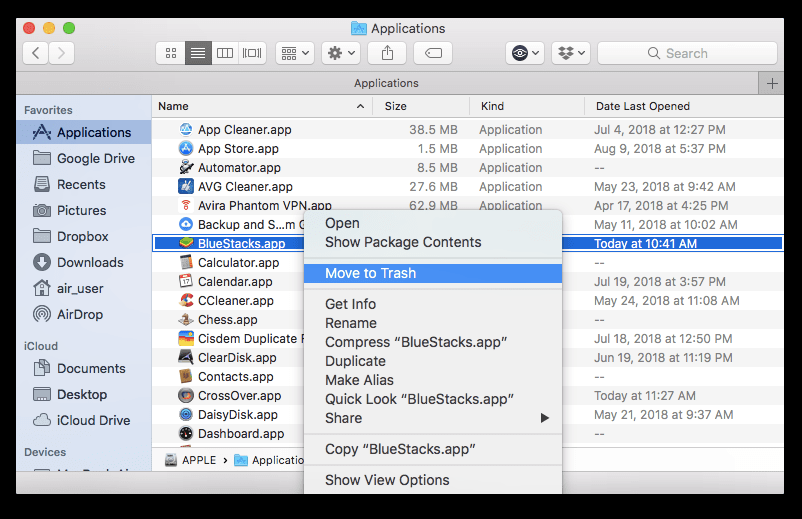
- Go-To Applications Folder. The next step is to go to the Applications Folder. To do that, you should go to Finder first and then select Applications.
- Move Towards Trash. Now, find the app that says BlueStacks. Right-click this app and then choose Move To Trash. Or, you can also drag the app towards the Trash and then drop it.
- Choose To Empty Your Trash. Now, the next step will be to empty your Trash. However, this is not the last step. In order to implement how to uninstall BlueStacks on Mac completely, you need to remove leftover files.
Now, you have to make sure you implement how to uninstall BlueStacks on Mac by removing the residual files. You must make sure these trace files are removed in order to free up more space within your system. To do that, follow the steps below:
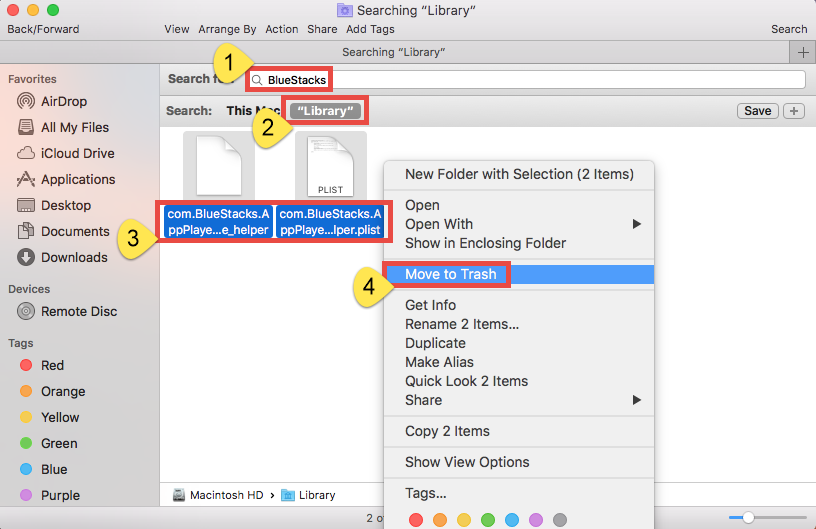
- Launch Finder. The first thing you have to do is to open Finder on your computer. Choose the option that says Go. After that, visit the option that says Go To Folder.
- Go To The Right Directory. The next step is to enter the command “/Library” within the box that appears. After that, press the button for Return or Enter.
- Type BlueStacks. The next thing you have to do is to input “BlueStacks” within the box that will appear. Then, select the button for Library.
- Go To The Different Folders. The next step is to find the folder below. Go to these folders one by one:
- /Library/StartupItems
- /Library/PreferencePanes
- /Library/LaunchDaemons
- /Library/LaunchAgents
- /Library/Preferences
- /Library/Application Support
- /Library
- Delete Associated Files. Now, you have to find the leftover files within the system and move them towards the Trash.
- Empty Trash. The last step is to empty your Trash.
Part 3. How To Uninstall Apps On Mac Without Deleting Files?
Now, we will teach you how to uninstall BlueStacks on Mac easily. This can be done through PowerMac. This tool will help you remove apps from your system without leaving any residual files. It helps to optimize your computer by doing a lot of things. Some of its features include the following:
- It helps to remove unnecessary files from your system. This also helps to free up more storage space and make sure your Mac is not cluttered.
- It helps to manage startup items and plugins. This hastens your bootup process.
- It helps to remove apps. PowerMyMac helps to uninstall apps within your system too. It makes sure it removes leftover files too.
- It speeds up your Mac. By removing leftovers, apps, and unnecessary files, speeds up your Mac computer.
Here are the steps on how to uninstall BlueStacks on Mac using PowerMyMac:
Step 01. Download, Install And Launch The Tool
The first step involves downloading the tool from its official website. Then, launch the installer and follow the prompts on the screen to install PowerMyMac. After that, launch the software.
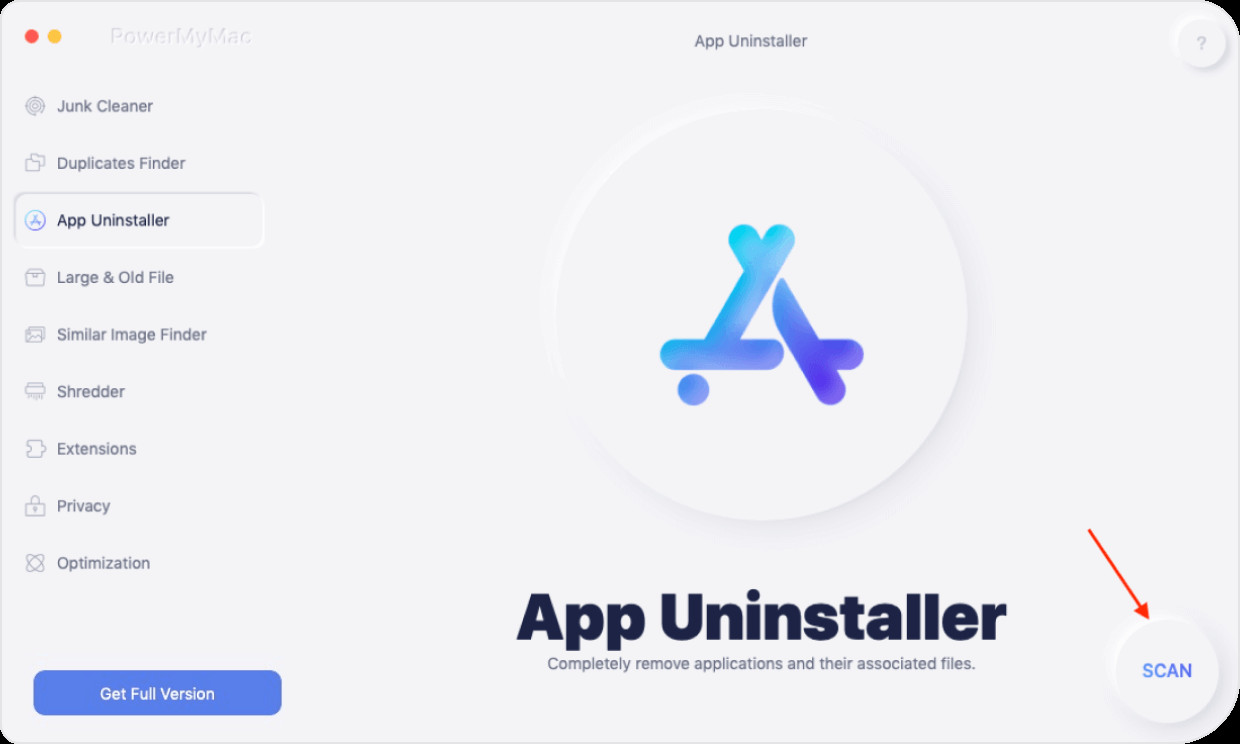
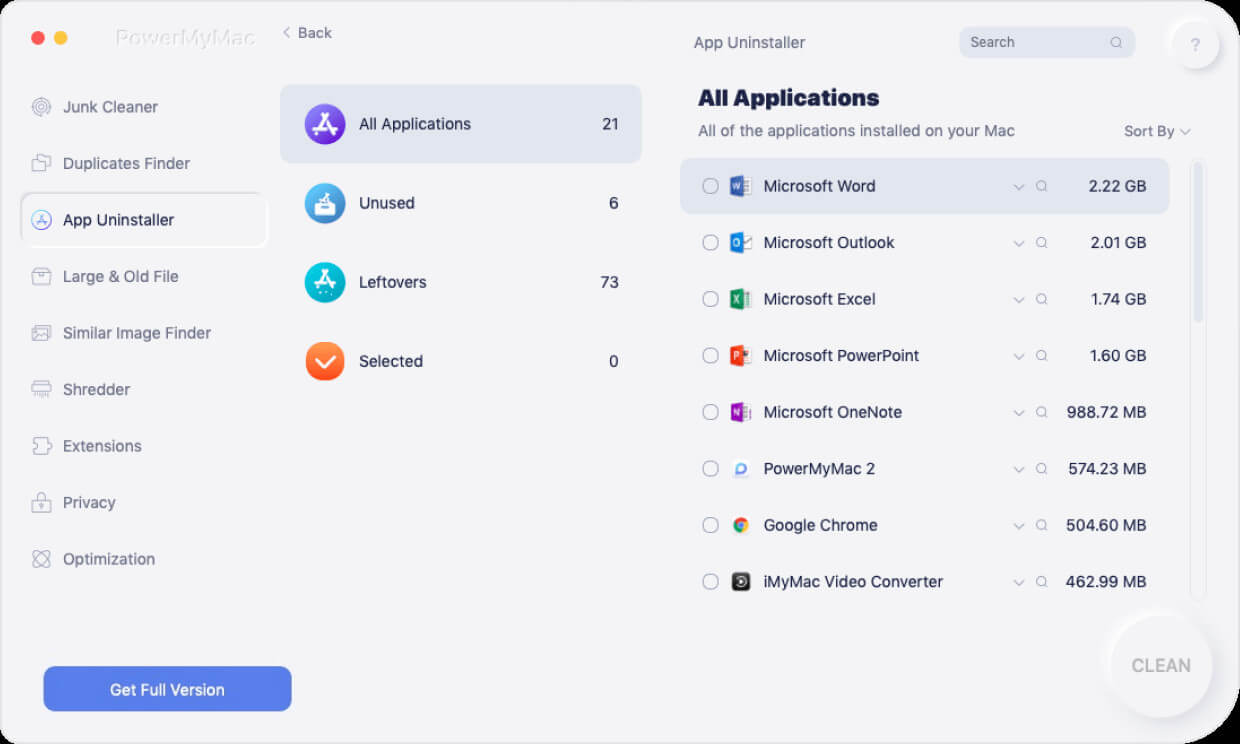
Step 02. Click App Uninstaller Module To Start
The left sidebar will show the modules of PowerMyMac. Click the App Uninstaller Module to start. Then, click the SCAN button to begin scanning for apps.
Step 03. Select Apps, Folders, And Files
The third step involves selecting the BlueStacks app on the list that appears. You can check its related files and folders on the right side of the computer.
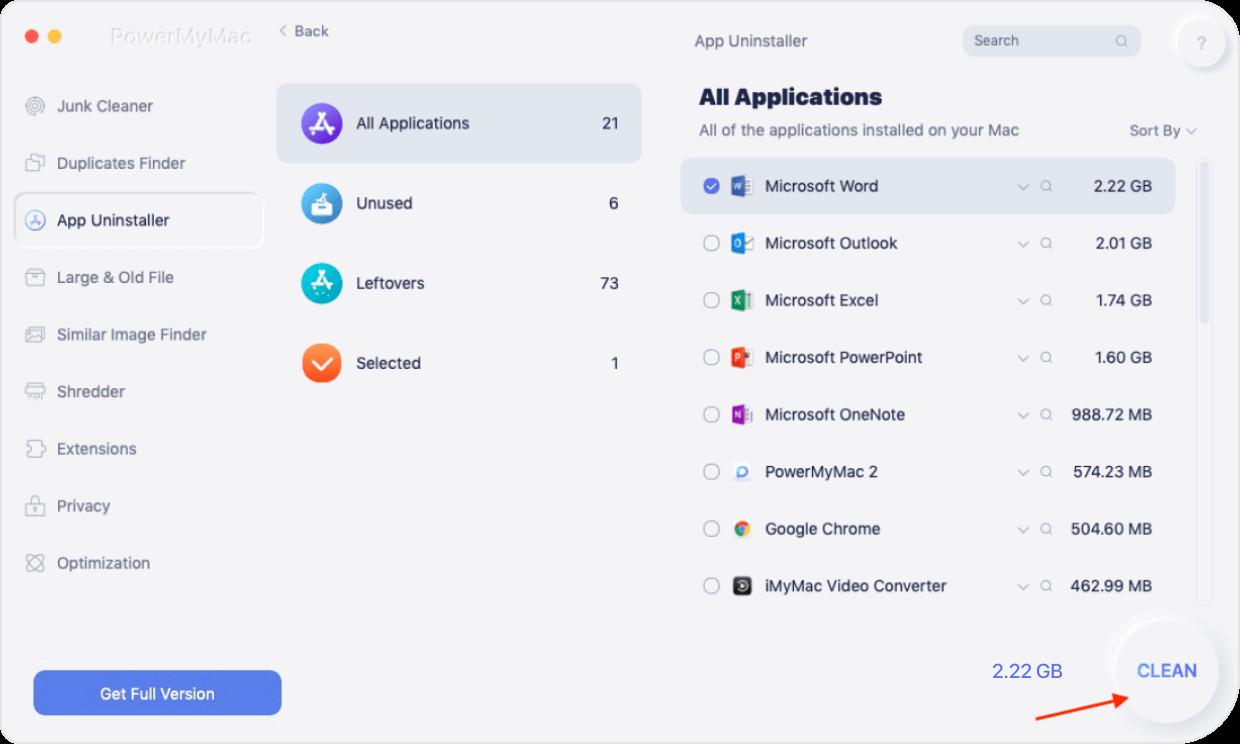
Step 04. Click The Clean Button On The Interface
Now, click the CLEAN button on the interface. Wait for the uninstallation and cleanup process to complete.
Now, we have taught you how to uninstall BlueStacks on Mac. We have answered the question if BlueStacks is safe as well. After that, we taught you how to remove your BlueStacks account if you want to.
Then, we have taught you how to uninstall BlueStacks on Mac. We have particularly taught two methods, the manual one and the automatic one. The manual one is a very tiring process. That’s why we don’t recommend it.
The best thing you should do is to use the PowerMyMac tool. This is a tool that helps to uninstall apps within your Mac. Plus, it helps to remove unnecessary files on your system. Click on the linked article to see details about deleting the files on mac. It’s a great way to optimize your Mac too! Grab PowerMyMac now!


