
Backing up your iPhone device is one of the most essential things to do. Because backing up your device is like keeping your precious data safe from any danger in the future. And doing this using your Mac is considered to be one of the best ways on how you can backup your iPhone device.
And when it comes to backing up your iPhone device on your Mac, there are two ways on how you can do this, one is by using the iCloud backup, and the other one is by using the built-in application on your Mac called the iTunes. However, knowing your iPhone backup location is a thing that most users do now know how to do. That is why in this post, we are going to show you a quick way for you to locate it on your Mac.
Part 1. Where Are iPhone Backups Stored on Mac?
When you do a backup on the data on your iPhone device, these backup files automatically will be saved somewhere on your Mac depending on how you had backed up your iPhone. It can be through your iTunes or by using your iCloud. When you want to locate iPhone backup on your Mac all you need to do is to make use of the directory: /User/YOURUSERNAME/Library/Application Support/MobileSync/Backup. But, for you to know the iPhone backup location, here is how you can do it.
Locate iPhone Backup in iTunes
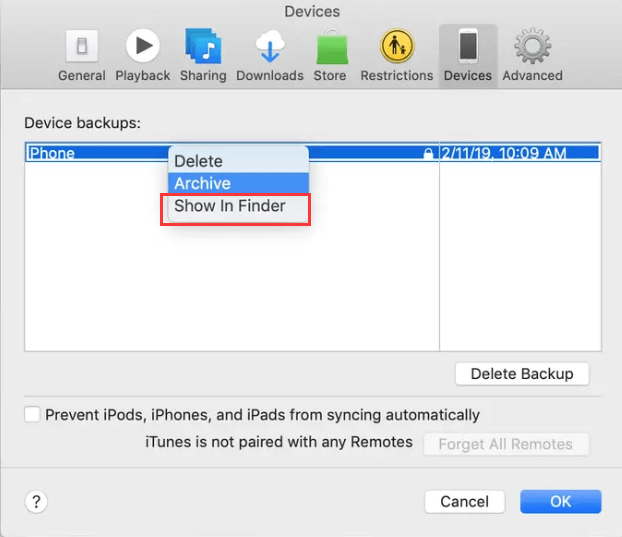
If in case you have more than one iOS device backed up on your Mac, then here are the steps that you need to follow so you could locate them from your iTunes program.
- Go ahead and launch the iTunes program.
- And from there, go ahead and click on Preferences.
- And then, go ahead and click on Device.
- And lastly, go ahead and control-click on the backup file that you want to work on with and then choose the Show in Finder option.
Locate iPhone Backup in iCloud
If you have backed up your iPhone device using your iCloud, it will not show up on your iCloud.com account. But do not panic because there is a way on how you can gain access to the iPhone backup location in iCloud.
- Click on the Apple menu and then choose System Preferences.
- From there, go ahead and click on iCloud.
- Then, choose Manage and then click on Backups.
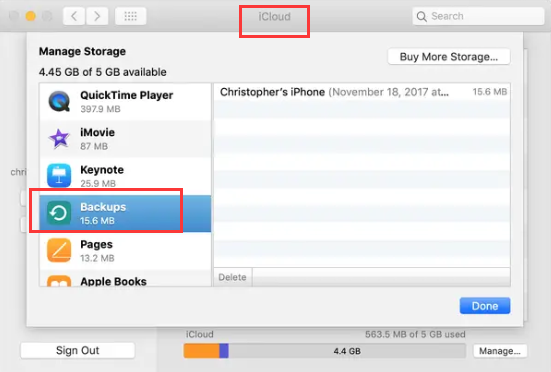
This will then locate all of your iPhone backups that you have using your iCloud account. Feel free to check on those backup files and then remove those that you no longer need.
Part 2. How to Change iPhone Backup Location on Mac
Way back before the macOS Catalina era, iTunes app is not the one that is backing up your iPhone device on to your Mac using a USB cable. It’s the Finder that does all of this. And the backup files made by it are actually kept in a hidden folder under your profile name and has a label of Backup and eventually turned into MobileSync.
Now, for you to be able to change the iPhone backup location on your Mac, there should be some symbolic links involved. This will help you in making a dummy folder that will point out to another location and will show up as a shortcut.
And for you to change the iPhone backup location on Mac, here are the steps that you will be needing to follow.
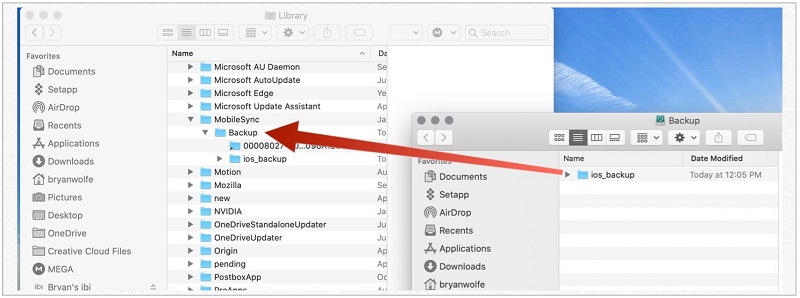
- On your Mac, go ahead and open up your Spotlight by pressing the Cmd key + Space key and then enter this path: ~/Library/Application Support/MobileSync
- And then, go ahead and right-click on the Backup folder and then choose Copy Backup.
- And then, launch another Finder tool and then open a certain folder wherein you want to move your backup. It depends on you if you want to move it to an external drive or another folder from your internal storage.
- And then, go ahead and wait for the backup folder and then copy it to the new location you have chosen. Doing this will take some time depending on the size of the backup files.
- And then, go back to the first Finder window that you have launched and right-click on the backup folder and then choose Rename.
- And then, rename of the folder to Backup.old.
- And then, launch the Apple menu and choose System Preferences.
- And then choose the tile labeled Security and Privacy.
- And then, click the lock to make changes button which is located at the lower-left side of your screen. And then head to the authentication process for you to allow the changes that you just made.
- And then, scroll down on the left side menu and then choose Full Disk Access and then choose the + sign below on the right side of your screen.
- And then, choose Utilities, choose Terminal and then click on the Open button below.
- And then, launch another Finder app and then choose the Go button and then select on Utilities.
- And then, double-click on the Terminal icon.
- And then, key in the following path: ln -s /Volume/Files/Backup/ ~/Library/Application\ Support/MobileSync/
- And then, do step 1 again and you should be able to see a folder there named Backup.
- And then, connect your iPhone and try to do a backup. This should be saved on the new location you made.
Part 3. How to Delete Old iPhone Backups on Mac
As we have said earlier, your old iPhone backup that had piled up on your Mac tends to eat a huge space on your Mac and this is one of the ideal data that you should be considering on deleting. That is why we are going to show you how you can delete old iPhone backups on Mac in two different ways.
Delete iPhone Backups on Mac Manually
The first method that we are going to show you is how you can delete old iPhone backups on Mac manually. This may seem like to take so much of your time but this will help you in getting familiar with your Mac. And, to be honest, deleting iPhone backups on Mac manually is very easy. All you need to do is to follow the steps below.
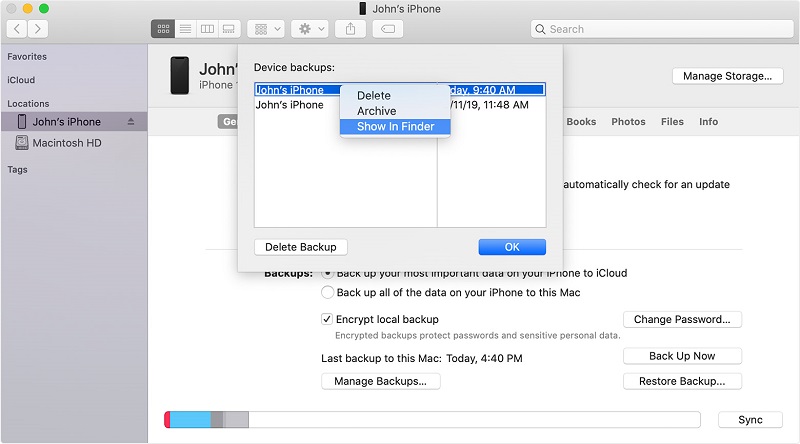
- Go ahead and launch on the iTunes program.
- And from there, go ahead and choose Preferences.
- After that, go ahead and click on the Devices option, and then you can choose from there the backup that you would like to delete.
- And then, select on the Delete Backup option and then click OK for you to confirm the process.
Delete iPhone Backups With PowerMyMac
Now, if you want it to be easier when it comes to deleting your old iPhone backups on Mac, then we have the perfect solution for you. And that is by using the PowerMyMac.
The PowerMyMac tool can collect all of the iTunes back-ups that you have on your Mac and will allow you to delete those that you no longer need. By using the PowerMyMac application to clean up your old iTunes backup files, you will then be able to free up more space for your storage and boost the speed of your Mac.
In addition to that, the PowerMyMac also can clean up other files that you no longer need on your Mac. And doing all of this is very easy and will only take you just a few clicks. Plus, this is a very safe application that you can use for your Mac.
And to show you how you can delete iPhone backups from Mac using the PowerMyMac here is a quick and simple guide that you can use to do the task.
Step 1. Launch PowerMyMac on Mac
Go ahead and double-click on the PowerMyMac icon from your dock once that you have installed it for you to run the tool. And then, by default, you will be taken to the Status page of the program wherein you will be shown on the status of your Mac systems such as your Disk space, Memory usage, and your CPU usage.

Step 2. Choose Master Scan
And on the same home page of the program, you will be able to see several options that you can choose from. From those options that you see on your screen, go ahead and choose the Master Scan option because this is where you will be able to find all of your iTunes backup that you have on your Mac.

Step 3. Scan Your iTunes Junk
And after that, the PowerMyMac will then ask you to scan your iTunes backup files on your Mac. All you need to do is to click on the Scan button and the scanning process will start. You will be able to see the progress of your scanning process on your screen as well.

Step 4. View Scanned iTunes Backup Files
Once that the scanning process is done, then you will be able to check out the files that you have scanned using the PowerMyMac including the iTunes back-ups.
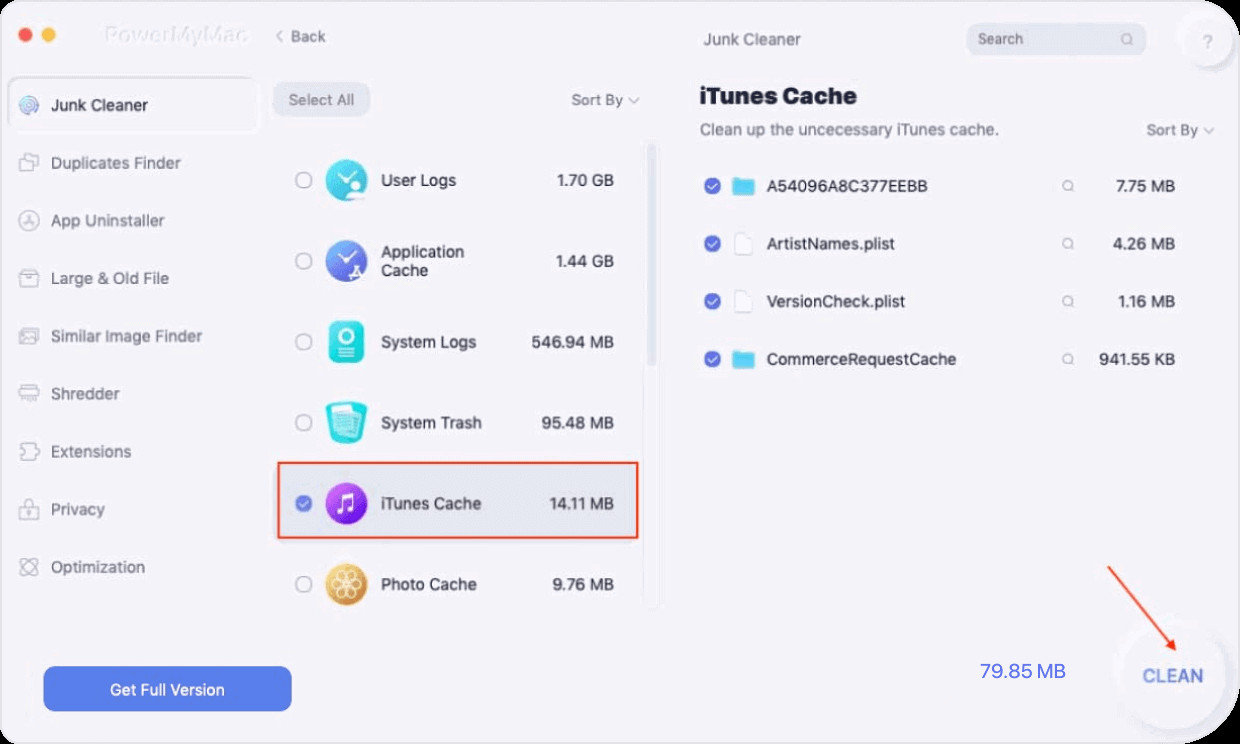
Step 5. Select iTunes Backup to Clean
And then, go ahead and choose the iPhone backups that you want to remove from your Mac. Just go ahead and click on the iTunes Backup from the left side of your screen, and all the files that it contains will show up on the right side. From there, click on the iTunes Backups that you want to delete from your Mac.
Step 7. Delete iTunes Backup
And once that you are done with choosing the iTunes backup that you want to delete, then go ahead and click on the Clean button located at the bottom of your screen. Then the chosen iPhone Backup files will then be deleted from your Mac.
Part 4. How to Restore Deleted iPhone Backup from iPhone
Now, your question might come at the end of this article such as how can you restore or get back those iPhone backups that you have just deleted from your Mac, right? Well, the answer to that is very simple. There might not be a way on using any of the built-in tools that you have on your Mac but there is another way on how you can do this. And that is by using a powerful tool of your choice for you to recover any lost data from your Mac. You just have to make sure that what you are going to choose is the one that is powerful enough that will allow you to recover your lost iPhone backup safely and easily.
Part 5. Conclusion
And there you have it. That is how you can do iPhone backup location and other things that you needed to know about the iPhone backups that you have on your Mac. However, if in case that you want to delete some of the iPhone backups that you will find on your Mac, the best and safest way to do this is by using the PowerMyMac tool. This is the most efficient tool that you can use.


